
In another post, I discussed why attorneys are big fans of dash cameras. In this post, I will run through my installation of a Garmin Dash Cam 57.

I ordered the dash cam directly from Garmin. I chose the Dash Cam 57 with a screen. I felt this one offered the best combination of video quality, viewing angle and cost.
I also ordered the parking mode cable so I could hardwire the camera into the car instead of using the cigarette lighter adapter that came with the camera. There is also an OBD-II port power supply available, but I use my OBD-II port for other things. I think the parking mode cable provides the cleanest looking install as well.
Here are links to these two items:
Other stuff you will need:
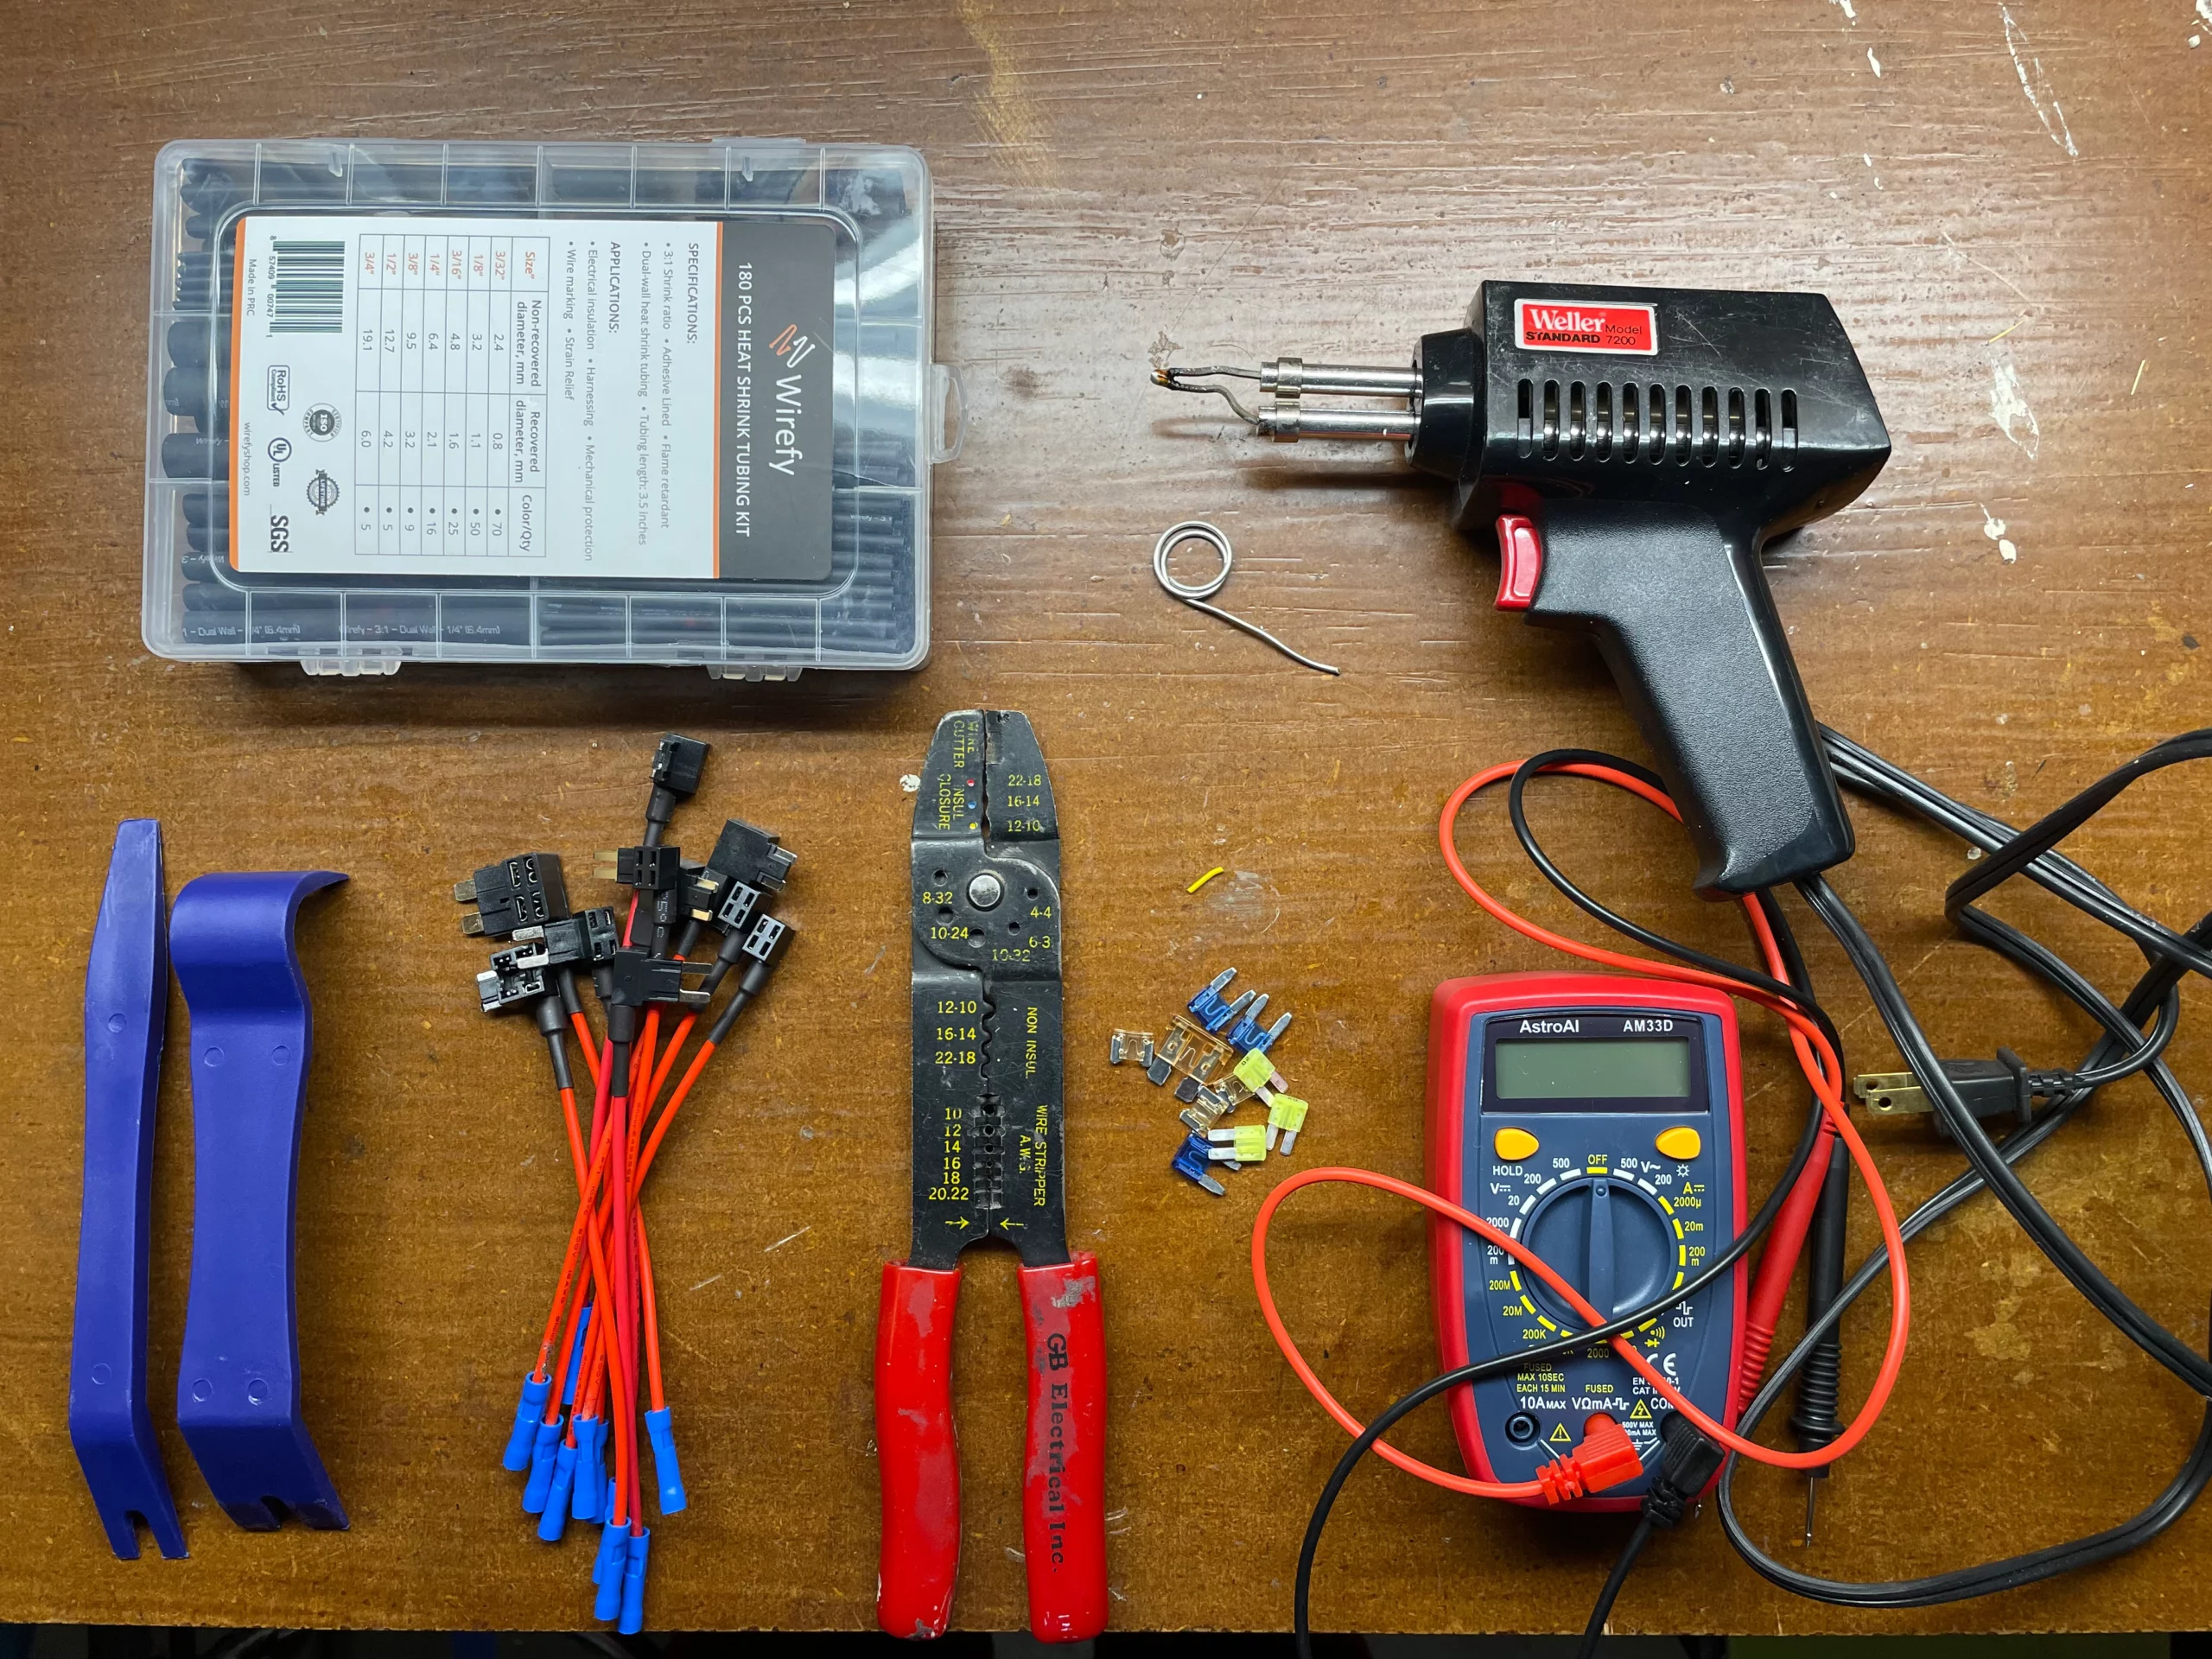
- Multimeter. Mine died, so I ordered this one from Amazon.
- Fuse Tap variety pack. I ordered this set from Amazon.
- Wire stripper like this.
- Soldering iron and solder like this.
- Heat shrink wrap like this.
- Automotive trim tools. I already had these from Amazon.
Dash Cam Installation Steps
Place the camera.
I placed the camera onto the windshield first. Top Tip: Turn the camera on when you are figuring out where to place it. It has a battery inside so it will run without being plugged in. Once it is on, you can move it around the windshield to find a space where it is out of the way and still has a clear view forward. I found that where I initially wanted to mount the camera, the arm attaching the rear view mirror to the windshield obstructed part of the view.
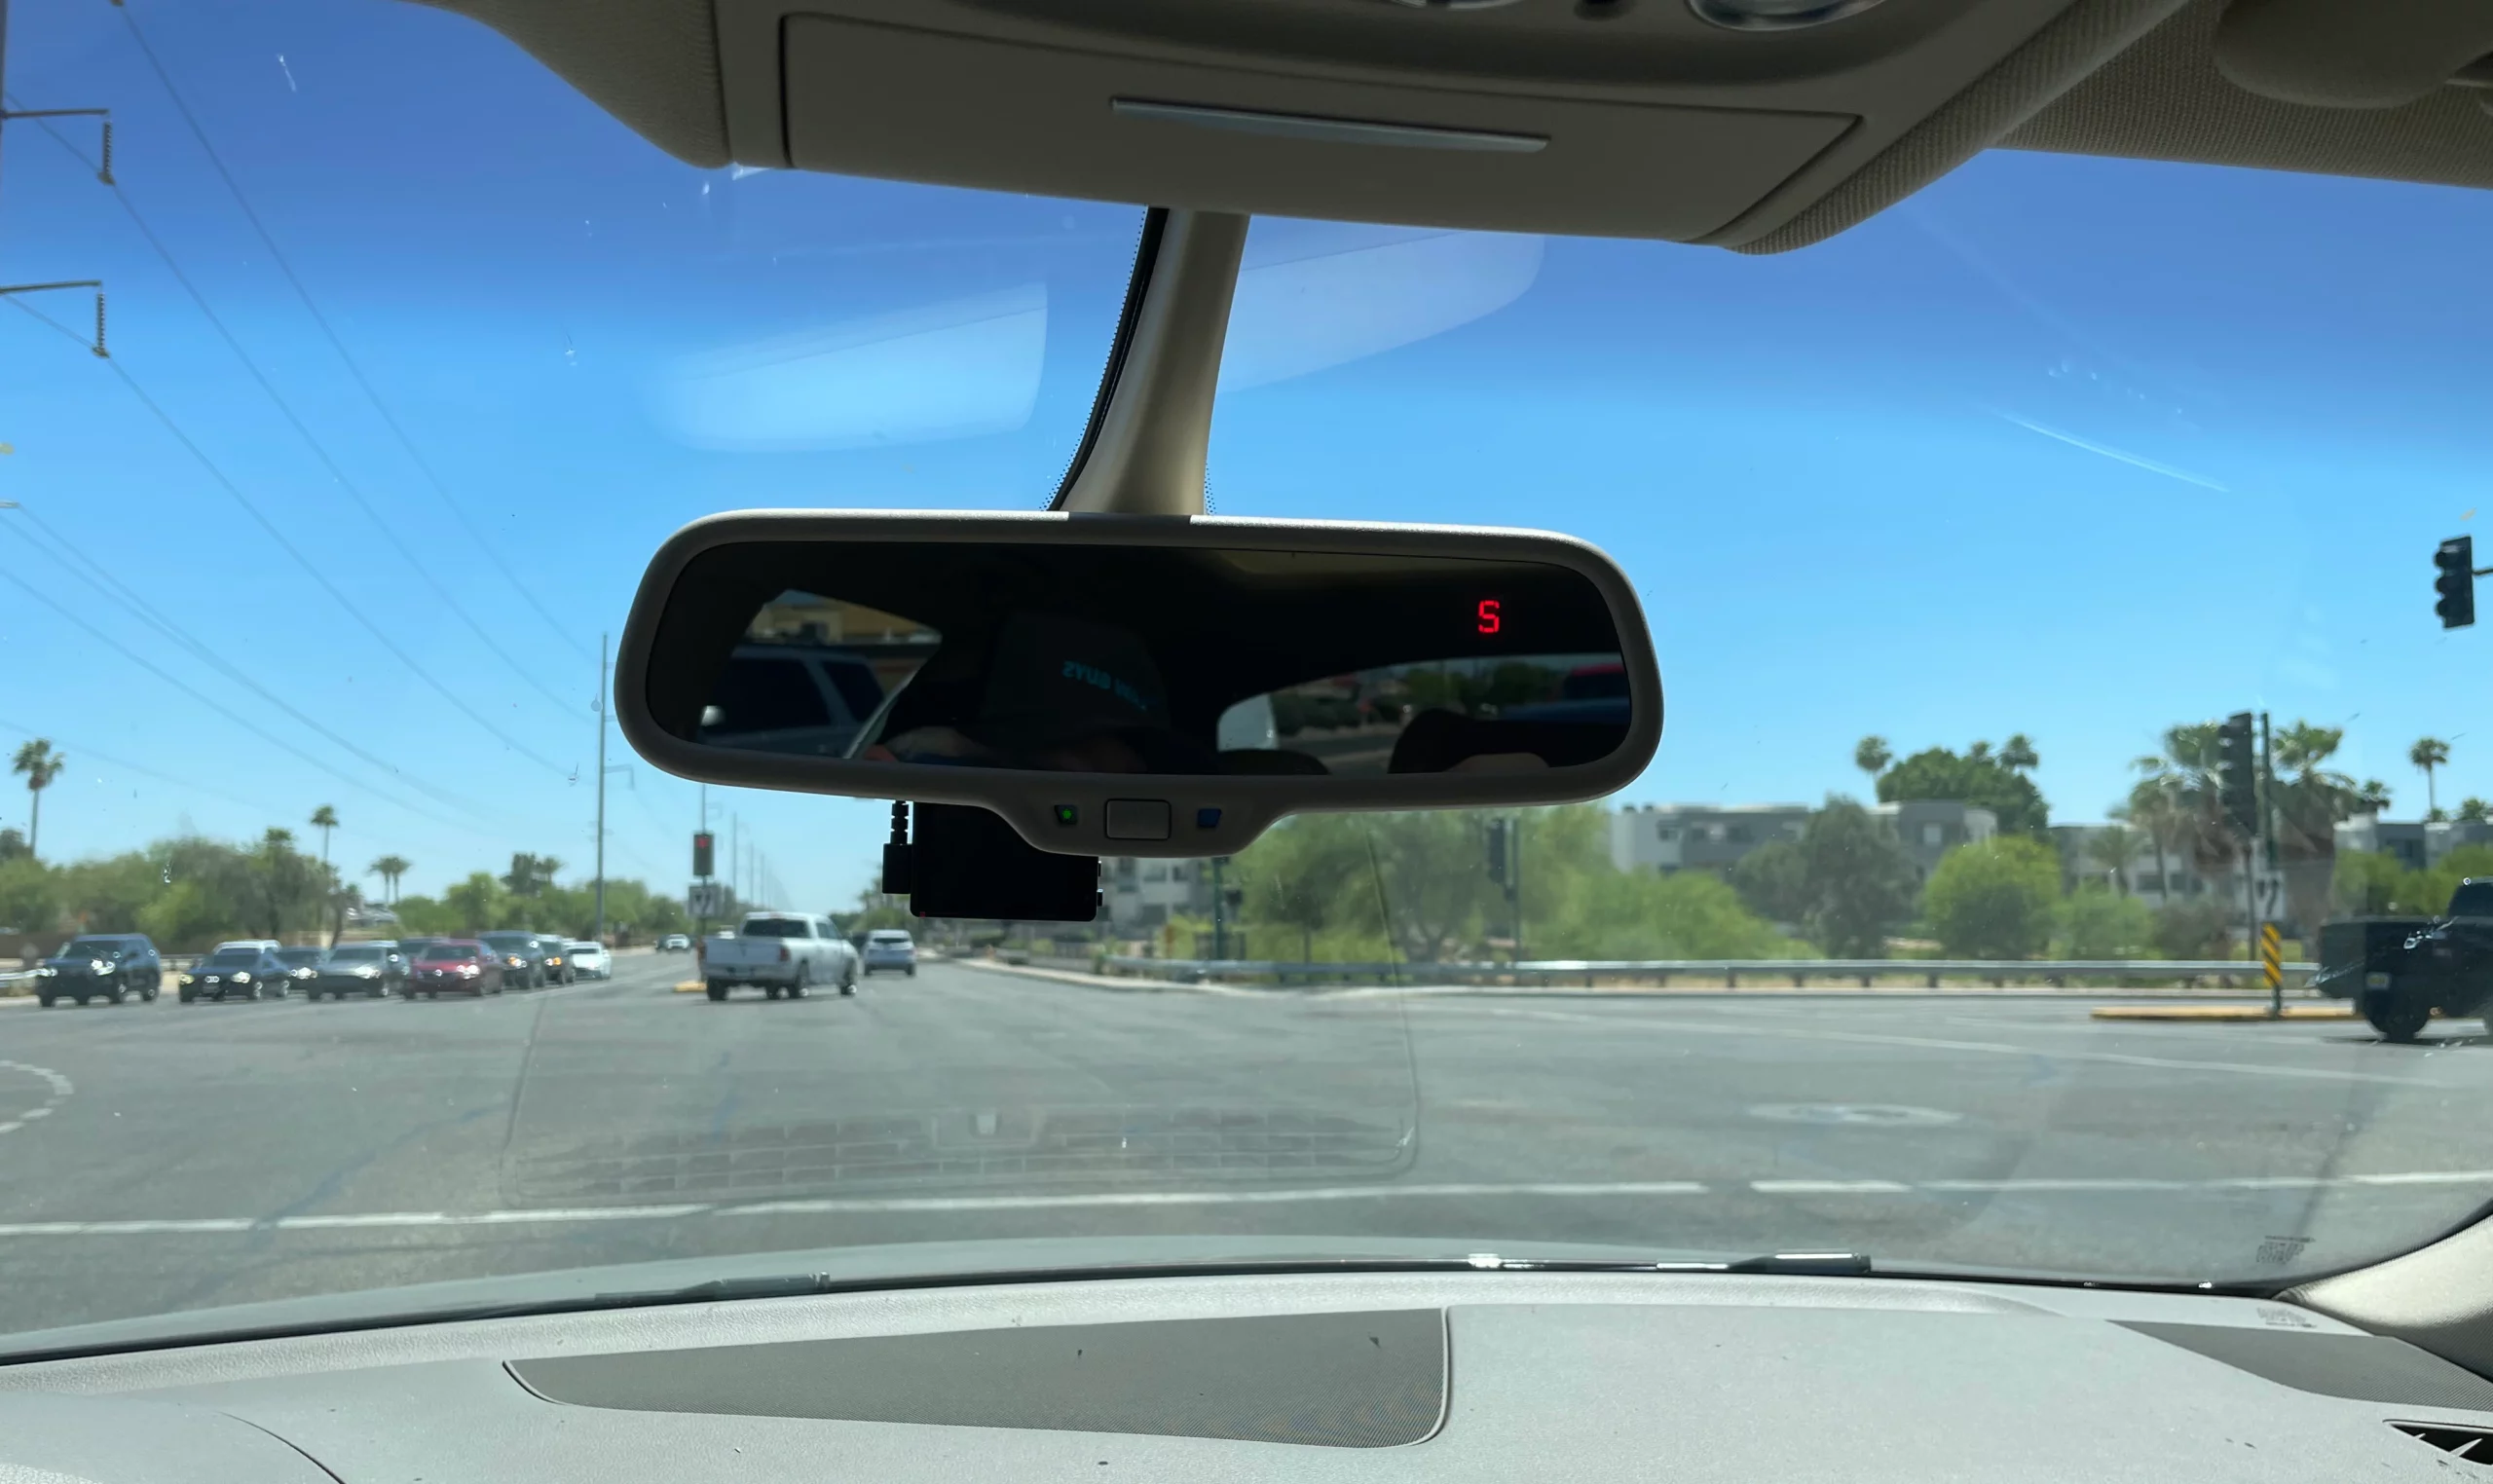
The camera attaches with a magnet to a little disc that sticks to the windshield. The camera is then very easy to remove from the vehicle. I had to pop the little disc off the windshield once to relocate it. The sticky was adequate for a second application.
Locate fuses and prep the parking mode cable.
Here’s where all that gear you assembled comes in. You will need to use the multimeter to figure out where to attach the wires of the parking mode cable.
Yellow wire: This is the battery wire, or constant power wire. This wire needs to have power when the ignition is off. I used my multimeter to check various fuse slots until I located one that had power when the key was out of the ignition. The multimeter will show about 12V of power when you find a good spot.
Red wire: This is the accessory power wire. It will show no power when the ignition is off, and 12V when the ignition is on.
Black wire: This is the grounding wire. I stuck the red wire from my multimeter into a fuse slot I knew had power, and then poked around with the black wire from my multimeter until I found a bolt that was grounded. Loosen the bolt you locate affix the ground wire (after you have soldered the red and yellow wires to the fuse taps).
Once you know what fuse slots you will use, and thereby what size fuse tap you need, you can solder the fuse taps to your wires. I cut off the blue ends of the fuse taps and stripped back some wire. I think those blue ends are supposed to be crimped, but that wasn’t working for me. I slid a heat shrink tube over the red and yellow wires. Then I soldered the fuse taps to the wires. Then I slid the heat shrink tubes over the soldered joint, and heated them up to shrink them on.
Route the power cable.
You basically stuff the power cable into the gap between the headliner and the windshield and the A-Pillar and windshield to conceal it.
Plug the power cable into the camera. Route the cable up towards the headliner and start tucking. If it is a tight fit, you can use the plastic trim tools to slightly pry the headliner away just enough to squeeze the power cable in.
Top Tip: I found it helpful to make a little loop in the cable and then stuff the loop into the gap. The little loop provides a little slack. Inevitably, as you are hiding the cable, it gets tight and starts to pull out at some other spot. The little loop provides a little extra slack to keep the cable from pulling out.

Continue down along the A-pillar. I found this to be a much tighter fit than along the headliner. When I got to the base of the A-pillar, I was able to stuff the cable between the base of the A-pillar and the dash. The fusebox on my car is located on the left side of the dash.
Plug in the fuse taps and button things up.
Put fuses in the fuse taps, and plug the fuse taps into the fuse slots you identified previously. At this point you can attach the ground wire to the bolt you previously identified.
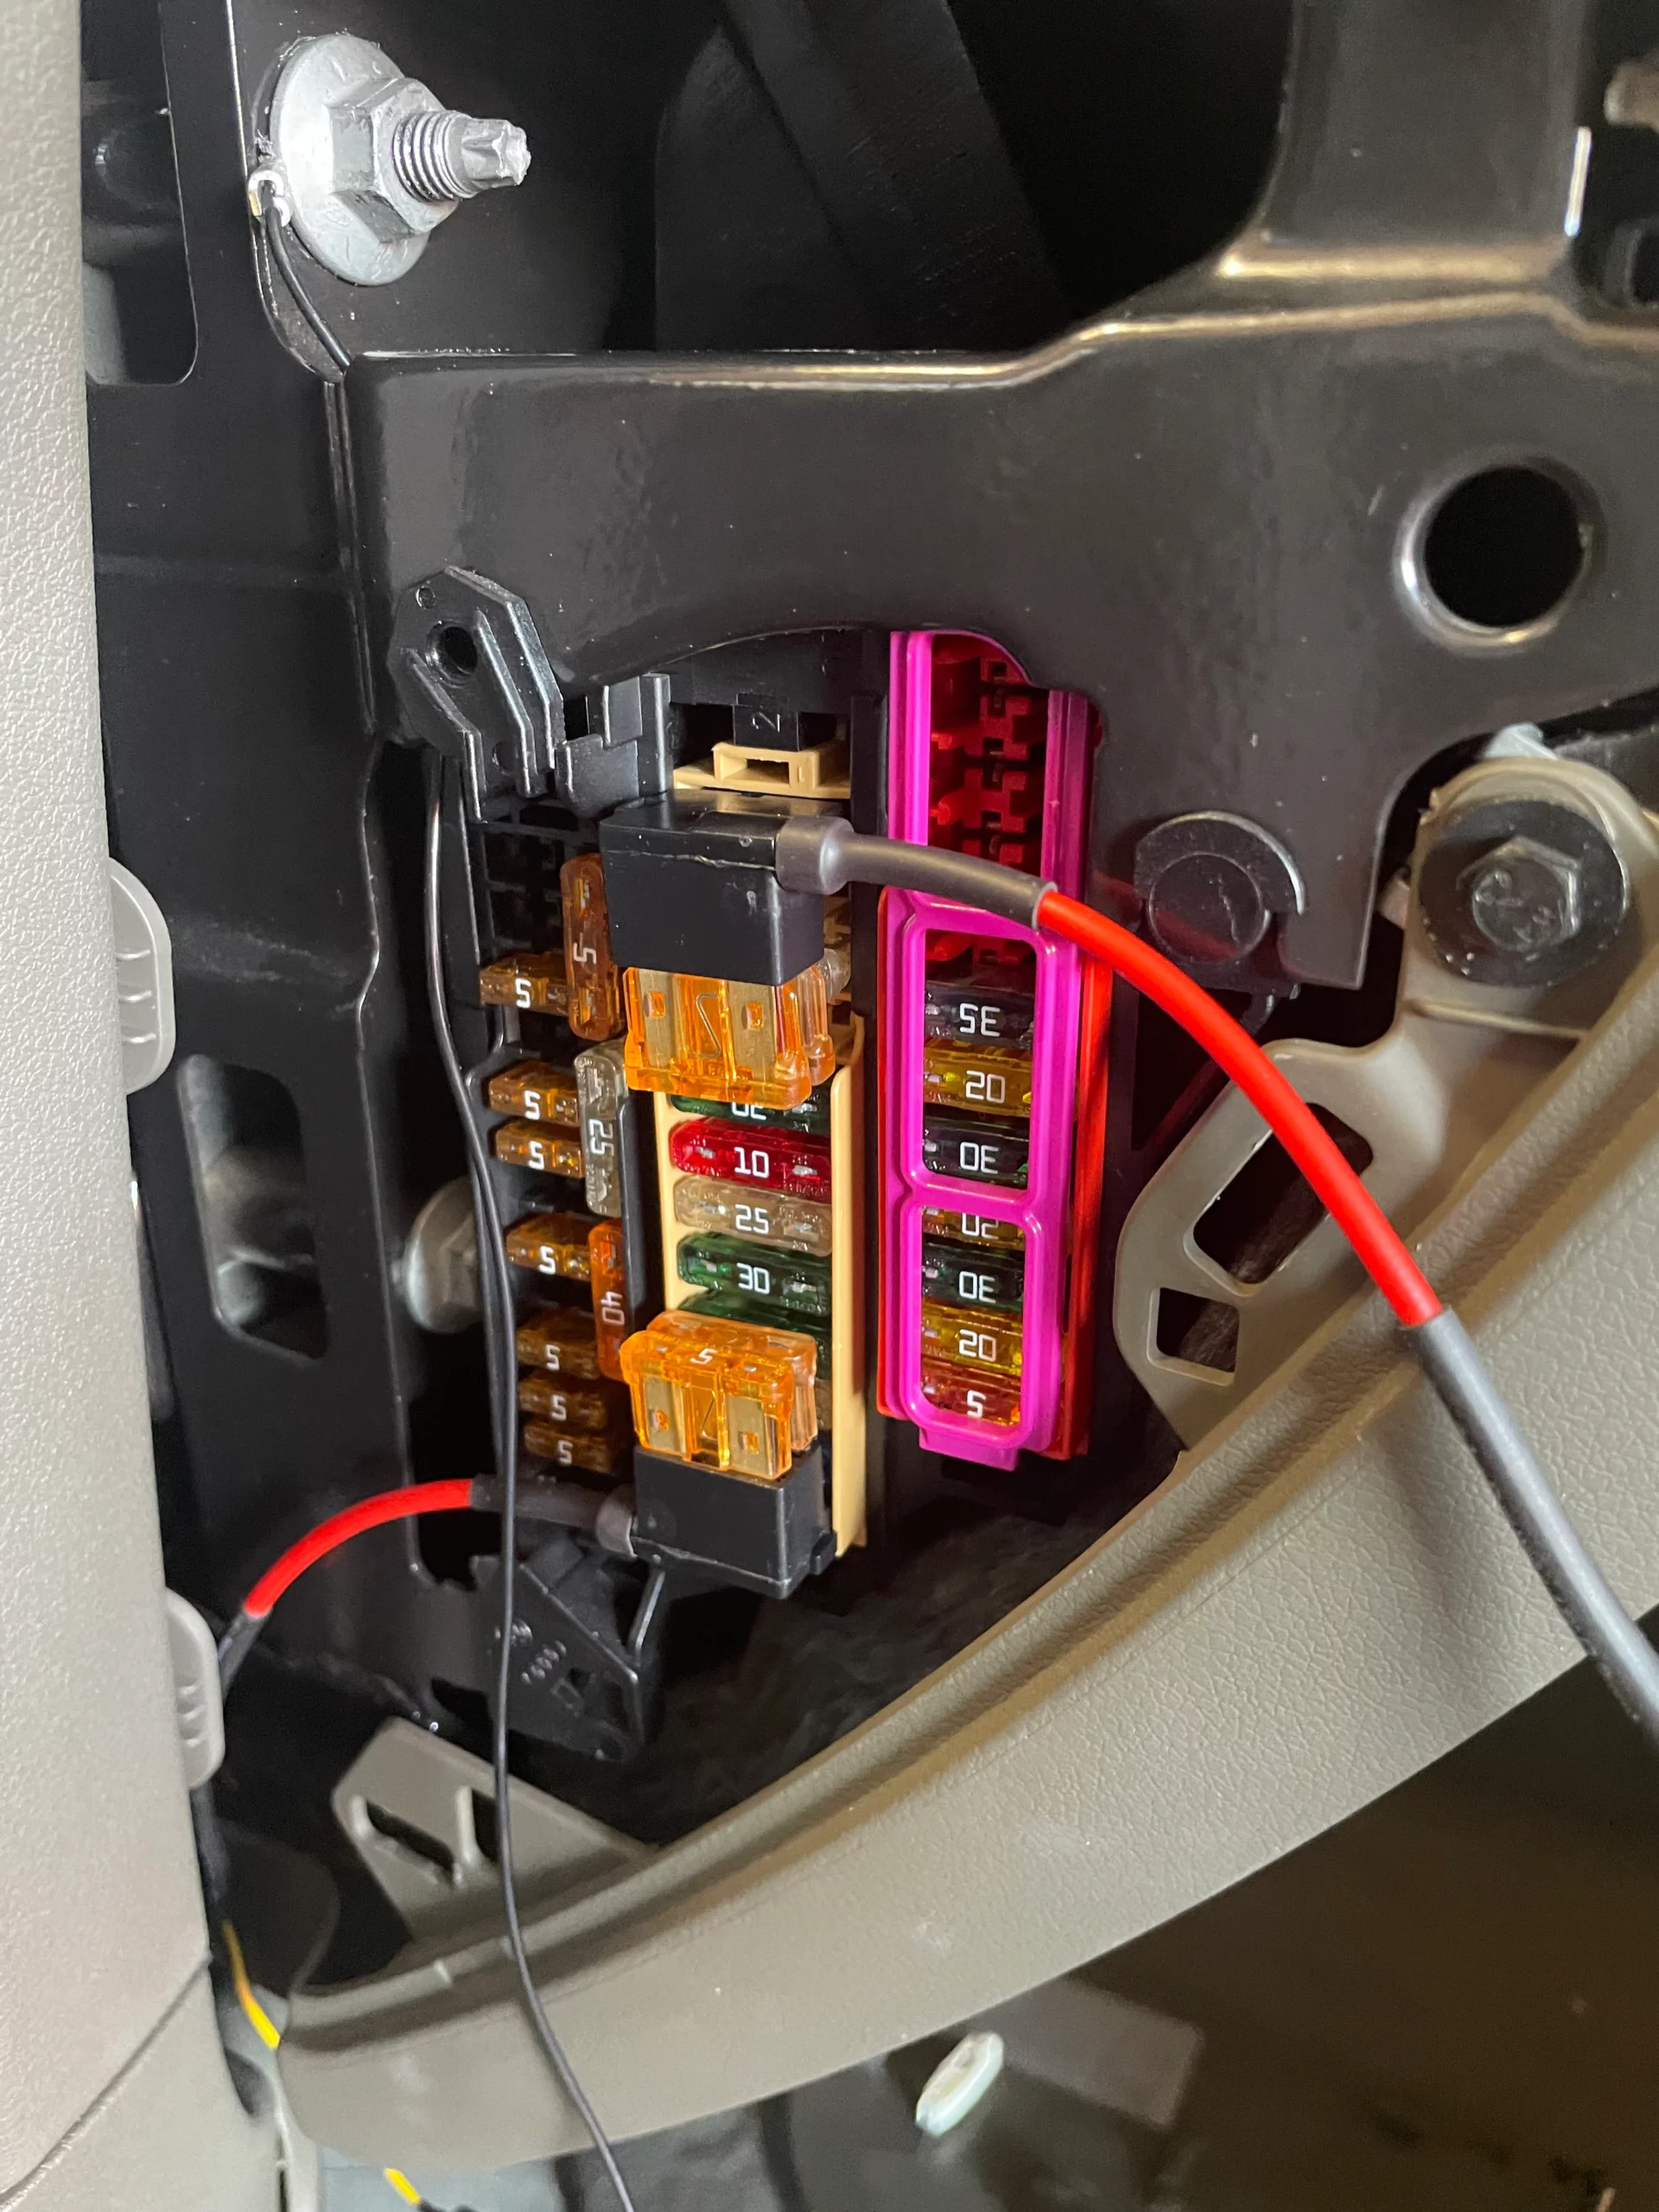
Once everything was connected, I rolled up the wires into a neat loop, and stuffed them into a gap above the fuses. Then I put the fuse box cover back in place. All done!
Setup the camera.
I found the camera to have a pretty intuitive interface. There are few options so it does not take long to explore them. I will talk more about the features of the camera in another post where I review the functionality of the camera. So far though, the user interface is far superior to the last camera I got on Amazon.
Garmin’s Installation Instructions
The installation instructions that came with the parking mode cable are awful. The instructions consist of a single square of paper with a link to a website for instruction. That in itself would not be bad, but the link is broken. When I searched Garmin’s website for instructions, the instructions I found simply told me to hire a professional for the installation. Wow.

Chris Rike is a founding partner of Traffic Law Guys, an Arizona law firm committed to protecting the rights of drivers facing criminal traffic charges.
I just did the same install, quite possibly on the same vehicle (is that a Q5?)
My camera doesn’t seem to want to try and charge unless the car is on – I thought the whole point of the hardwire to “BATT” was so that it would charge at all times. Does your camera charge while the car is off?
Hi Matt,
That is a Q5, how funny! My camera does stay powered when the car is off. When I was trying to find a fuse that was still powered when the ignition was off to tap into for the BATT/yellow connection, I did let the car sit for awhile and make sure the fuse I had selected still had power. I wonder if you have a circuit that is initially powered after you take the key out, but then times out at some point.